NOTE: You will have to use self-tapping screws to mount the base plate.
CAUTION: When using self-tapping screws, the use of silicone waterproof sealant is highly advised to prevent any leakages into the interior of the vehicle.
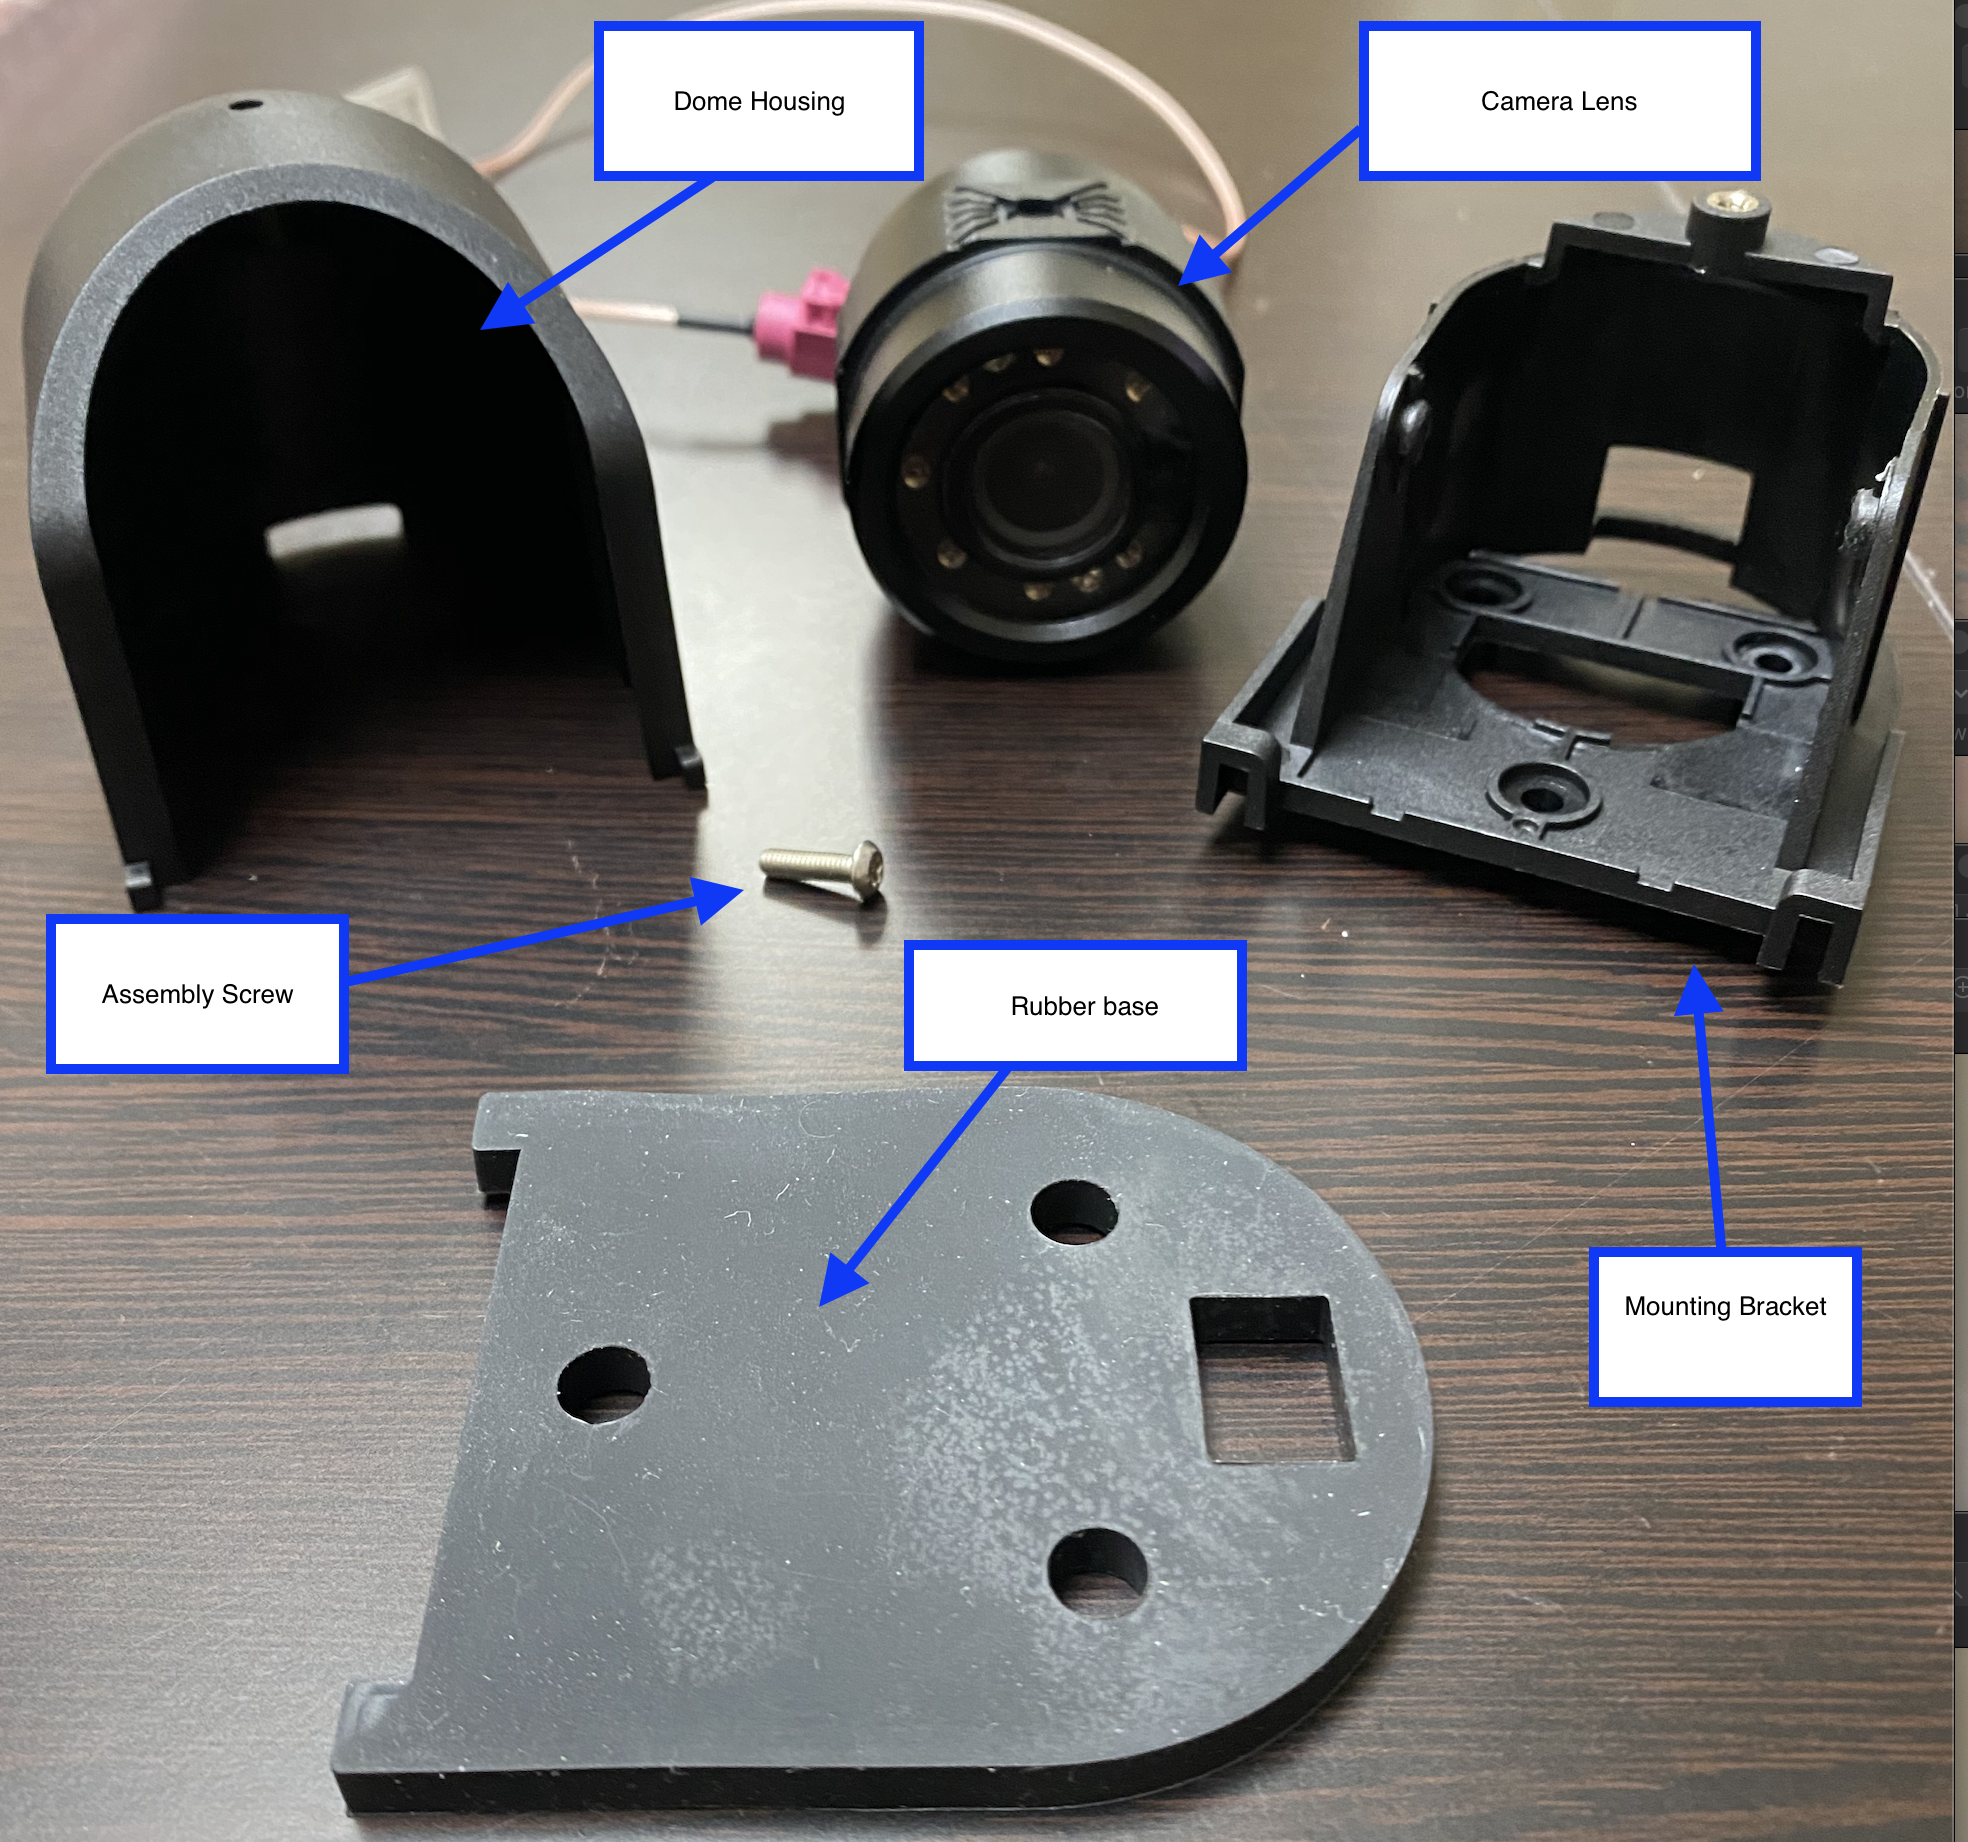
- Identify a suitable location to mount the exterior secondary camera.
- The Identified location must have a flat surface
- Please consider any potential obstructions to the secondary camera’s view when the vehicle is fully loaded.
- Place the rubber base with the mounting bracket on top at the desired location, facing in the direction of the Camera’s intended view.
- To mark the spots on the vehicle where the drill holes will be made, place the rubber base on the vehicle and use a drawing utensil to mark the location of the three screw holes.
- Carefully drill the holes in the predetermined spots.
- Use the Waterproof Silicone Sealant on the holes you have just drilled.
- While sealant is still wet, screw in 3 self-tapping screws in the 3 holes to secure the base and mounting bracket to the vehicle (as show below).
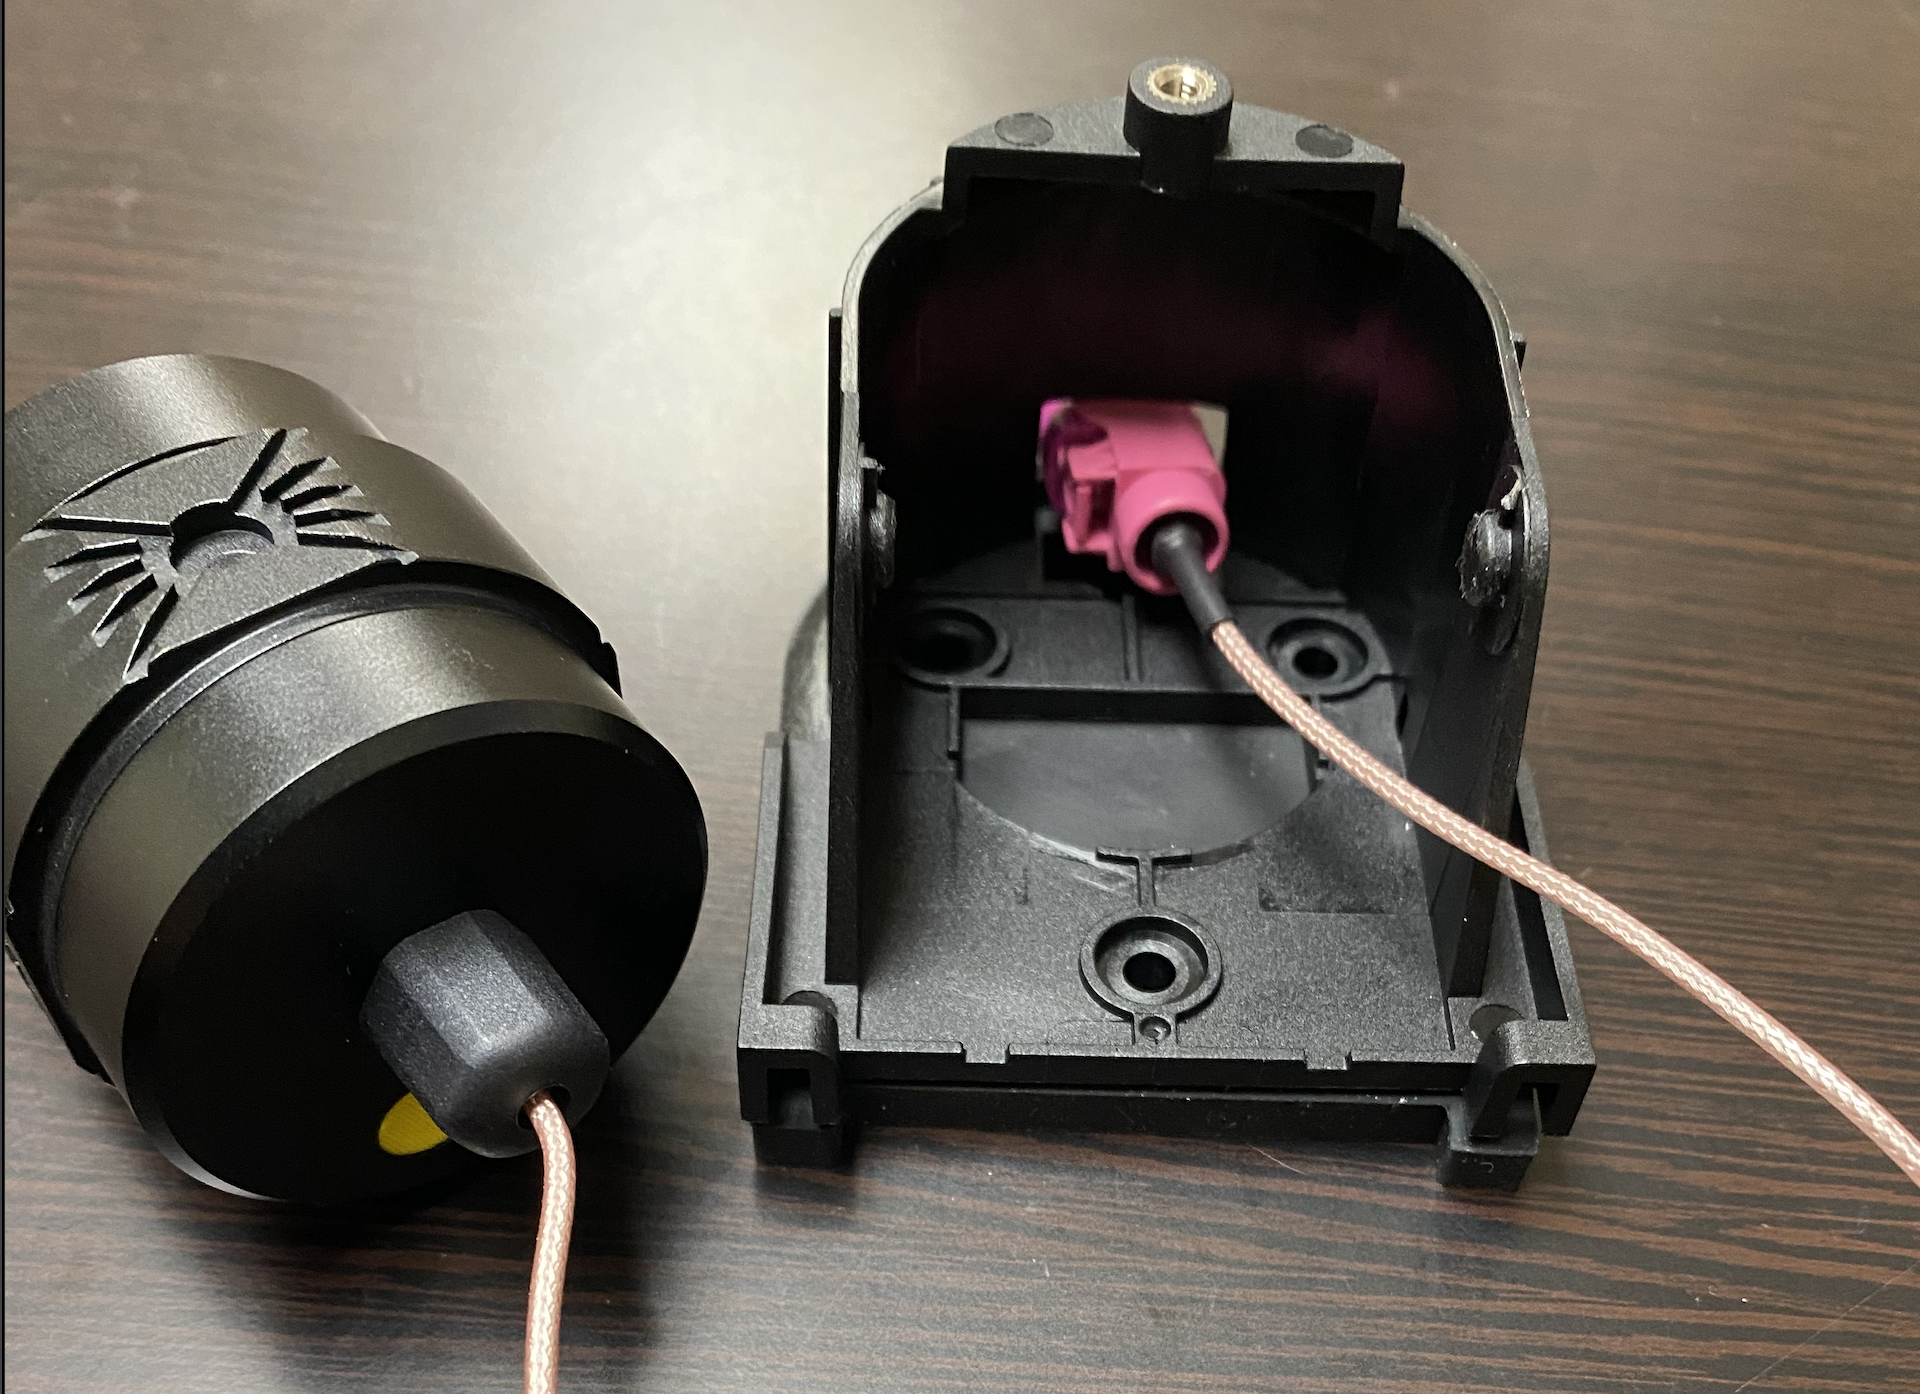
- Pull in the pink connector end of the secondary camera cable through the slot in the front of the mounting bracket, as show in the picture.
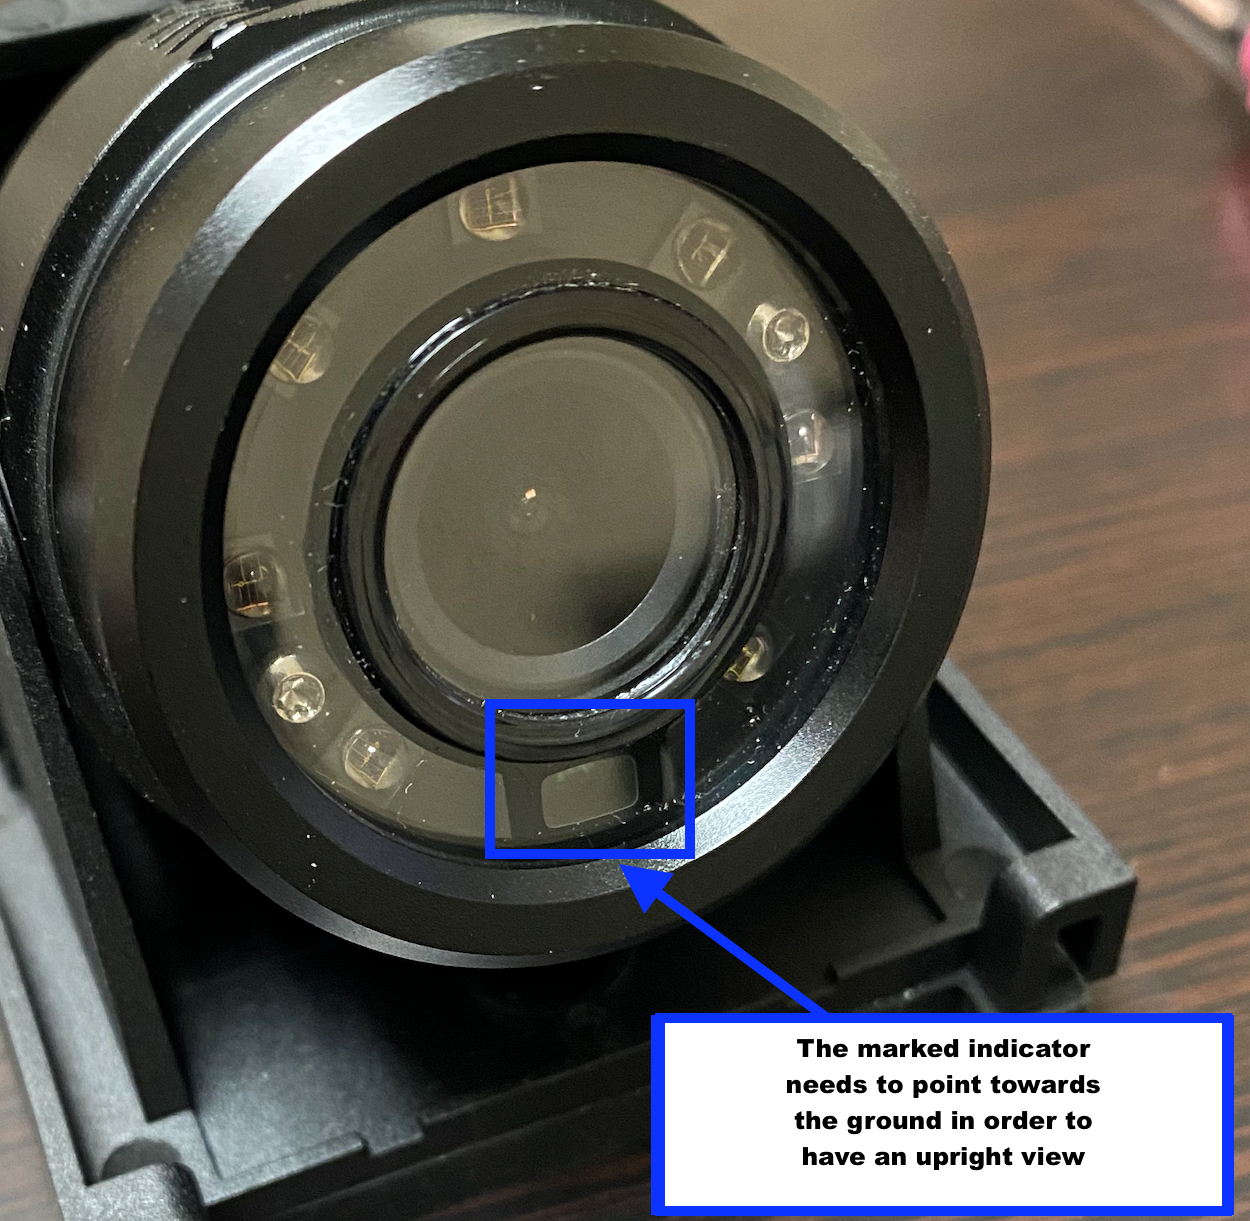
- Place the camera lens within the mounting bracket. Make sure that the lens is placed in the upright position, with the indicator pointing to the ground (as seen in the picture).
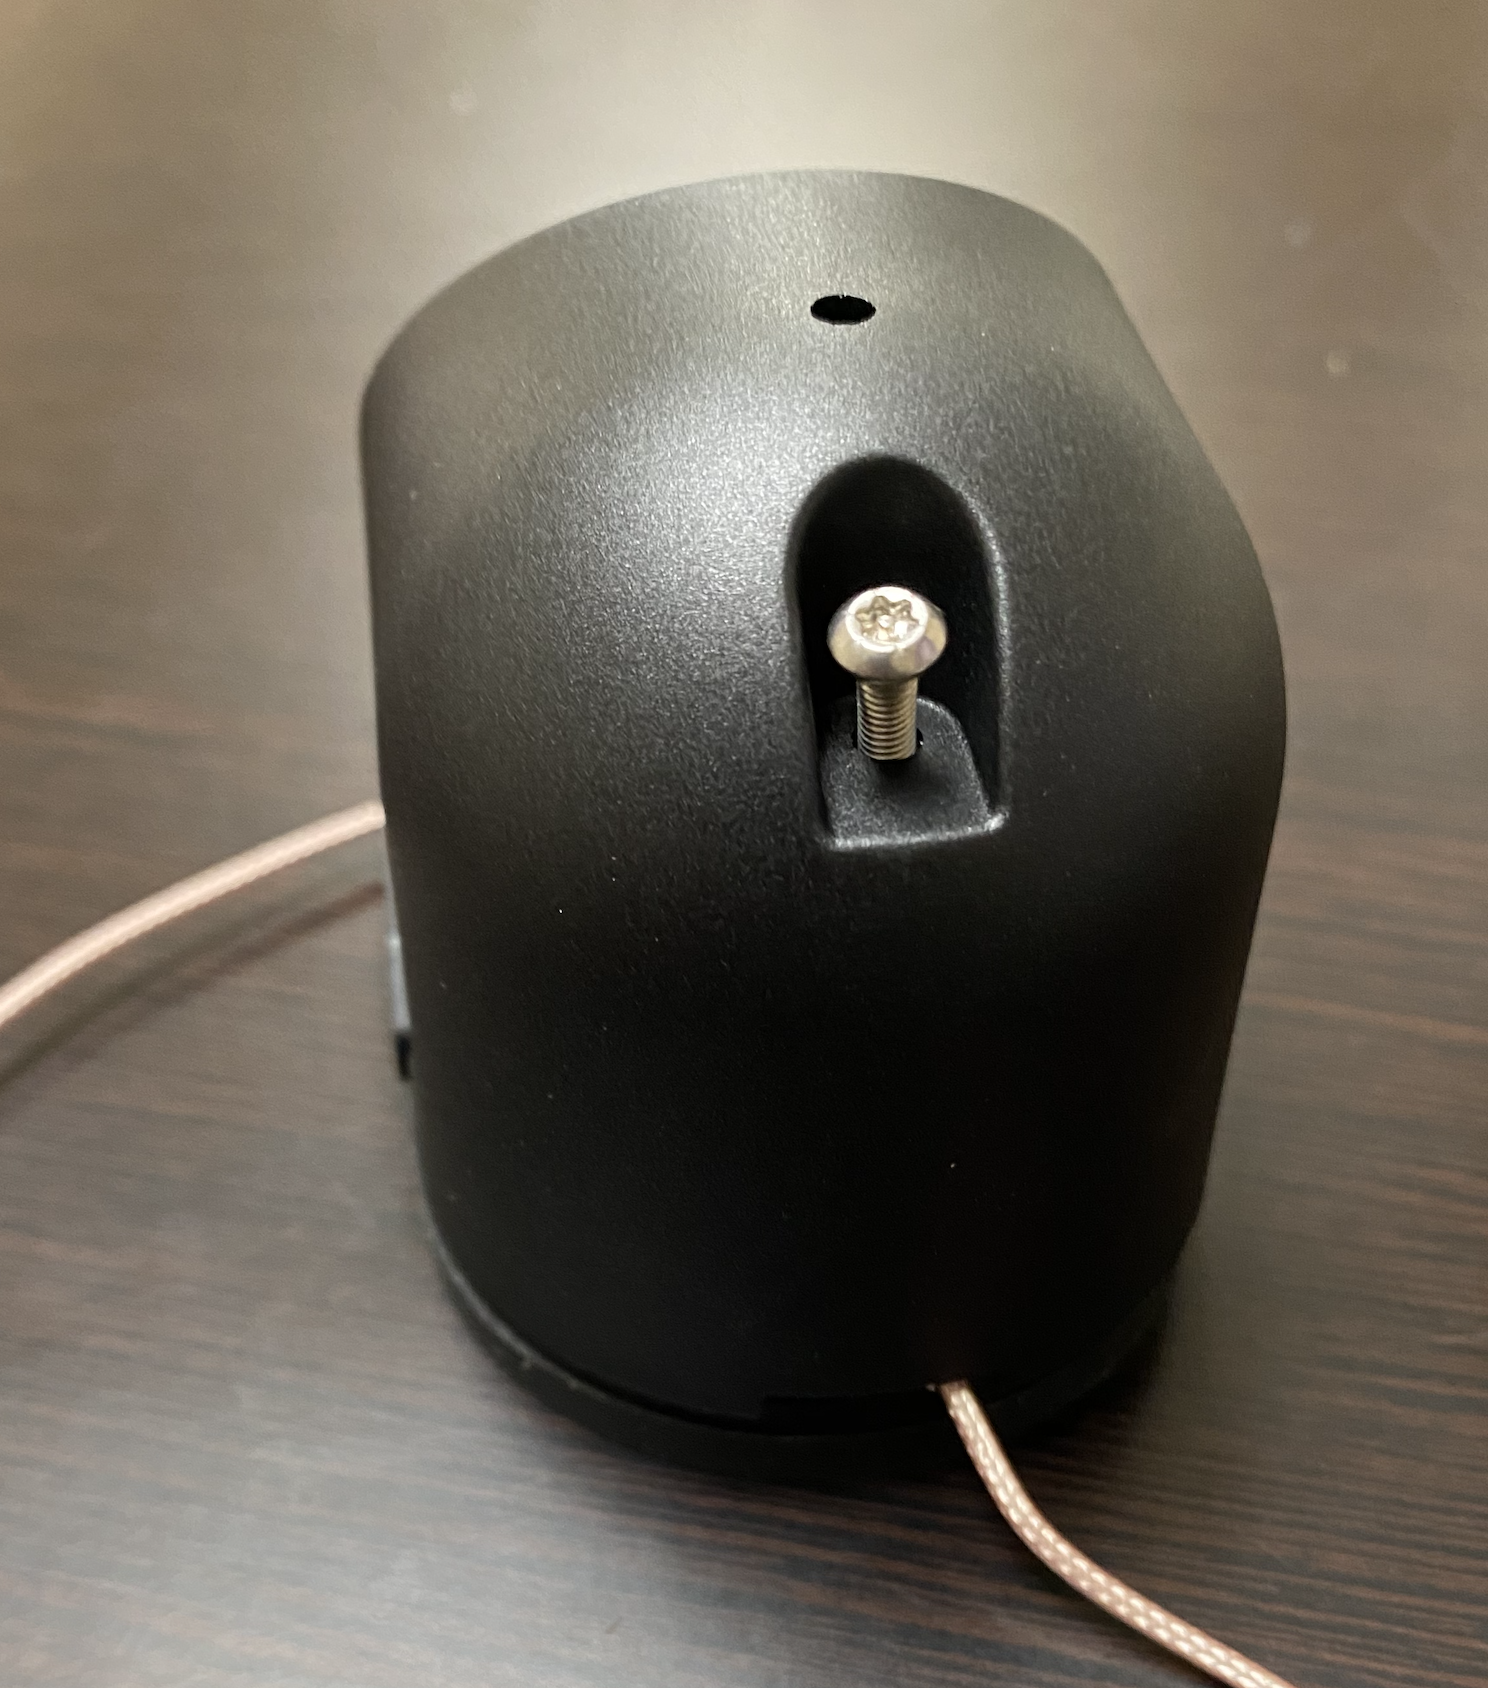
- Place the dome on the bracket and secure the assembly with the provided screw, as shown.